Using inverted high pass to smooth an area of skin (or anything including fabrics and seamless backdrops which we’ll also cover), is one of the most useful yet easy to overuse techniques in retouching.
It’s a fairly simple trick that smooths out a targeted radius in your image, allowing you to ‘blur out’ the shot while retaining a level of sharp texture that you control, then use masks to control the areas affected.
Simplified, the steps are;
- Create a ‘Stamp Visible‘ layer above your working layers (Shift+Cmd/Ctrl+Alt+E). You can’t do this from a single Background layer with no work layers so simply right click the Background tab and ‘Duplicate Layer.’
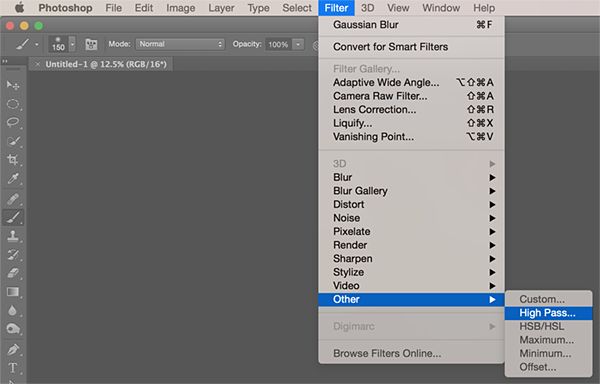
- Filter>Other>High Pass.
- Choose a Radius and click OK (choosing a radius is covered below)
- Filter>Blur>Gaussian Blur.
- The radius will be 1/3 of the High Pass Radius you chose
- Invert the layer (Cmd/Ctrl+I)
- Choose the Blend Mode. This is most often Linear Light or Overlay
- Add a mask to the layer.
- Black out the mask and use a white brush with hardness and opacity/flow set to your tastes to paint in the effect where needed.
The initial result (this example shows a radius of 30 High Pass/10 Gaussian Blur) will look something like this;
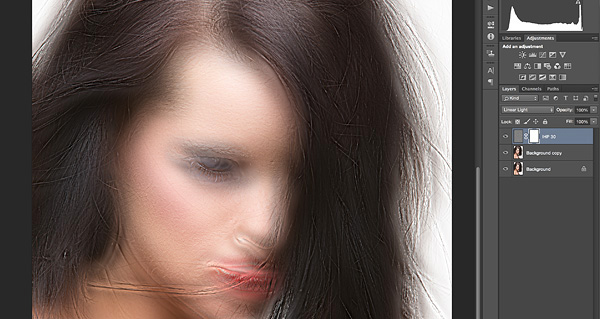
A closer look shows that the texture (lower radius detail) remains untouched;
Choosing a Radius
A photograph’s low radii contain the sharp detail and texture you see up close, pores, individual hairs etc. So for example the results of a high pass/gaussian blur ratio of just 9/3 may not be apparent if you zoom way out or stand across the room, but close up the changes are dramatic.
A much higher radius, for example a 60/20 ratio, will have a much more apparent effect on the image when zoomed out, on the shadows of the bone structure, smoothing overall transitions between light and dark.
Here I’ve used a relatively mid-range 21/7 inverted high pass, masked out with the skin areas quickly painted back into the mask;
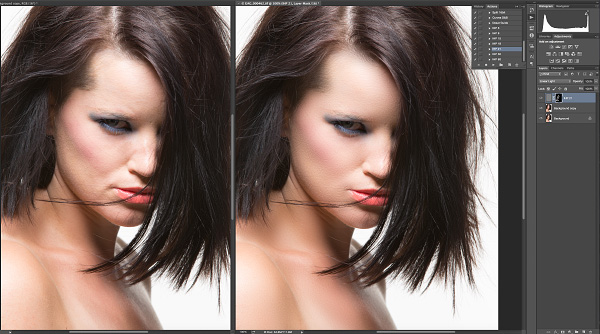
You can see that the results are quite dramatic when compared to the time it would have taken to dodge and burn.
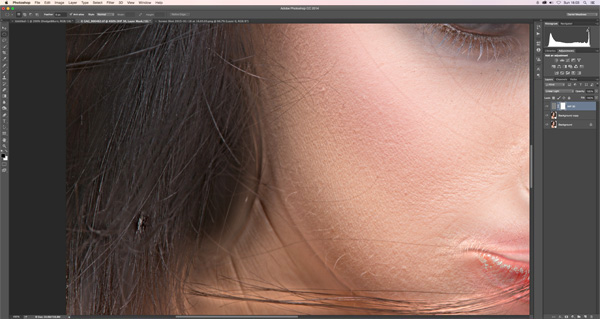
You’ll notice there are a few sharper (lower radius) detail areas like those at the corner of the mouth that stand out, so we can approach those with a lower radius. In the version below I’ve created two further inverted high passes of 15/5 and 9/3, and painted the effect in with a soft brush. There’s also a ‘cleanup’ layer for a few stray hairs/marks. Click on the following image for a link to the 5k resolution original;
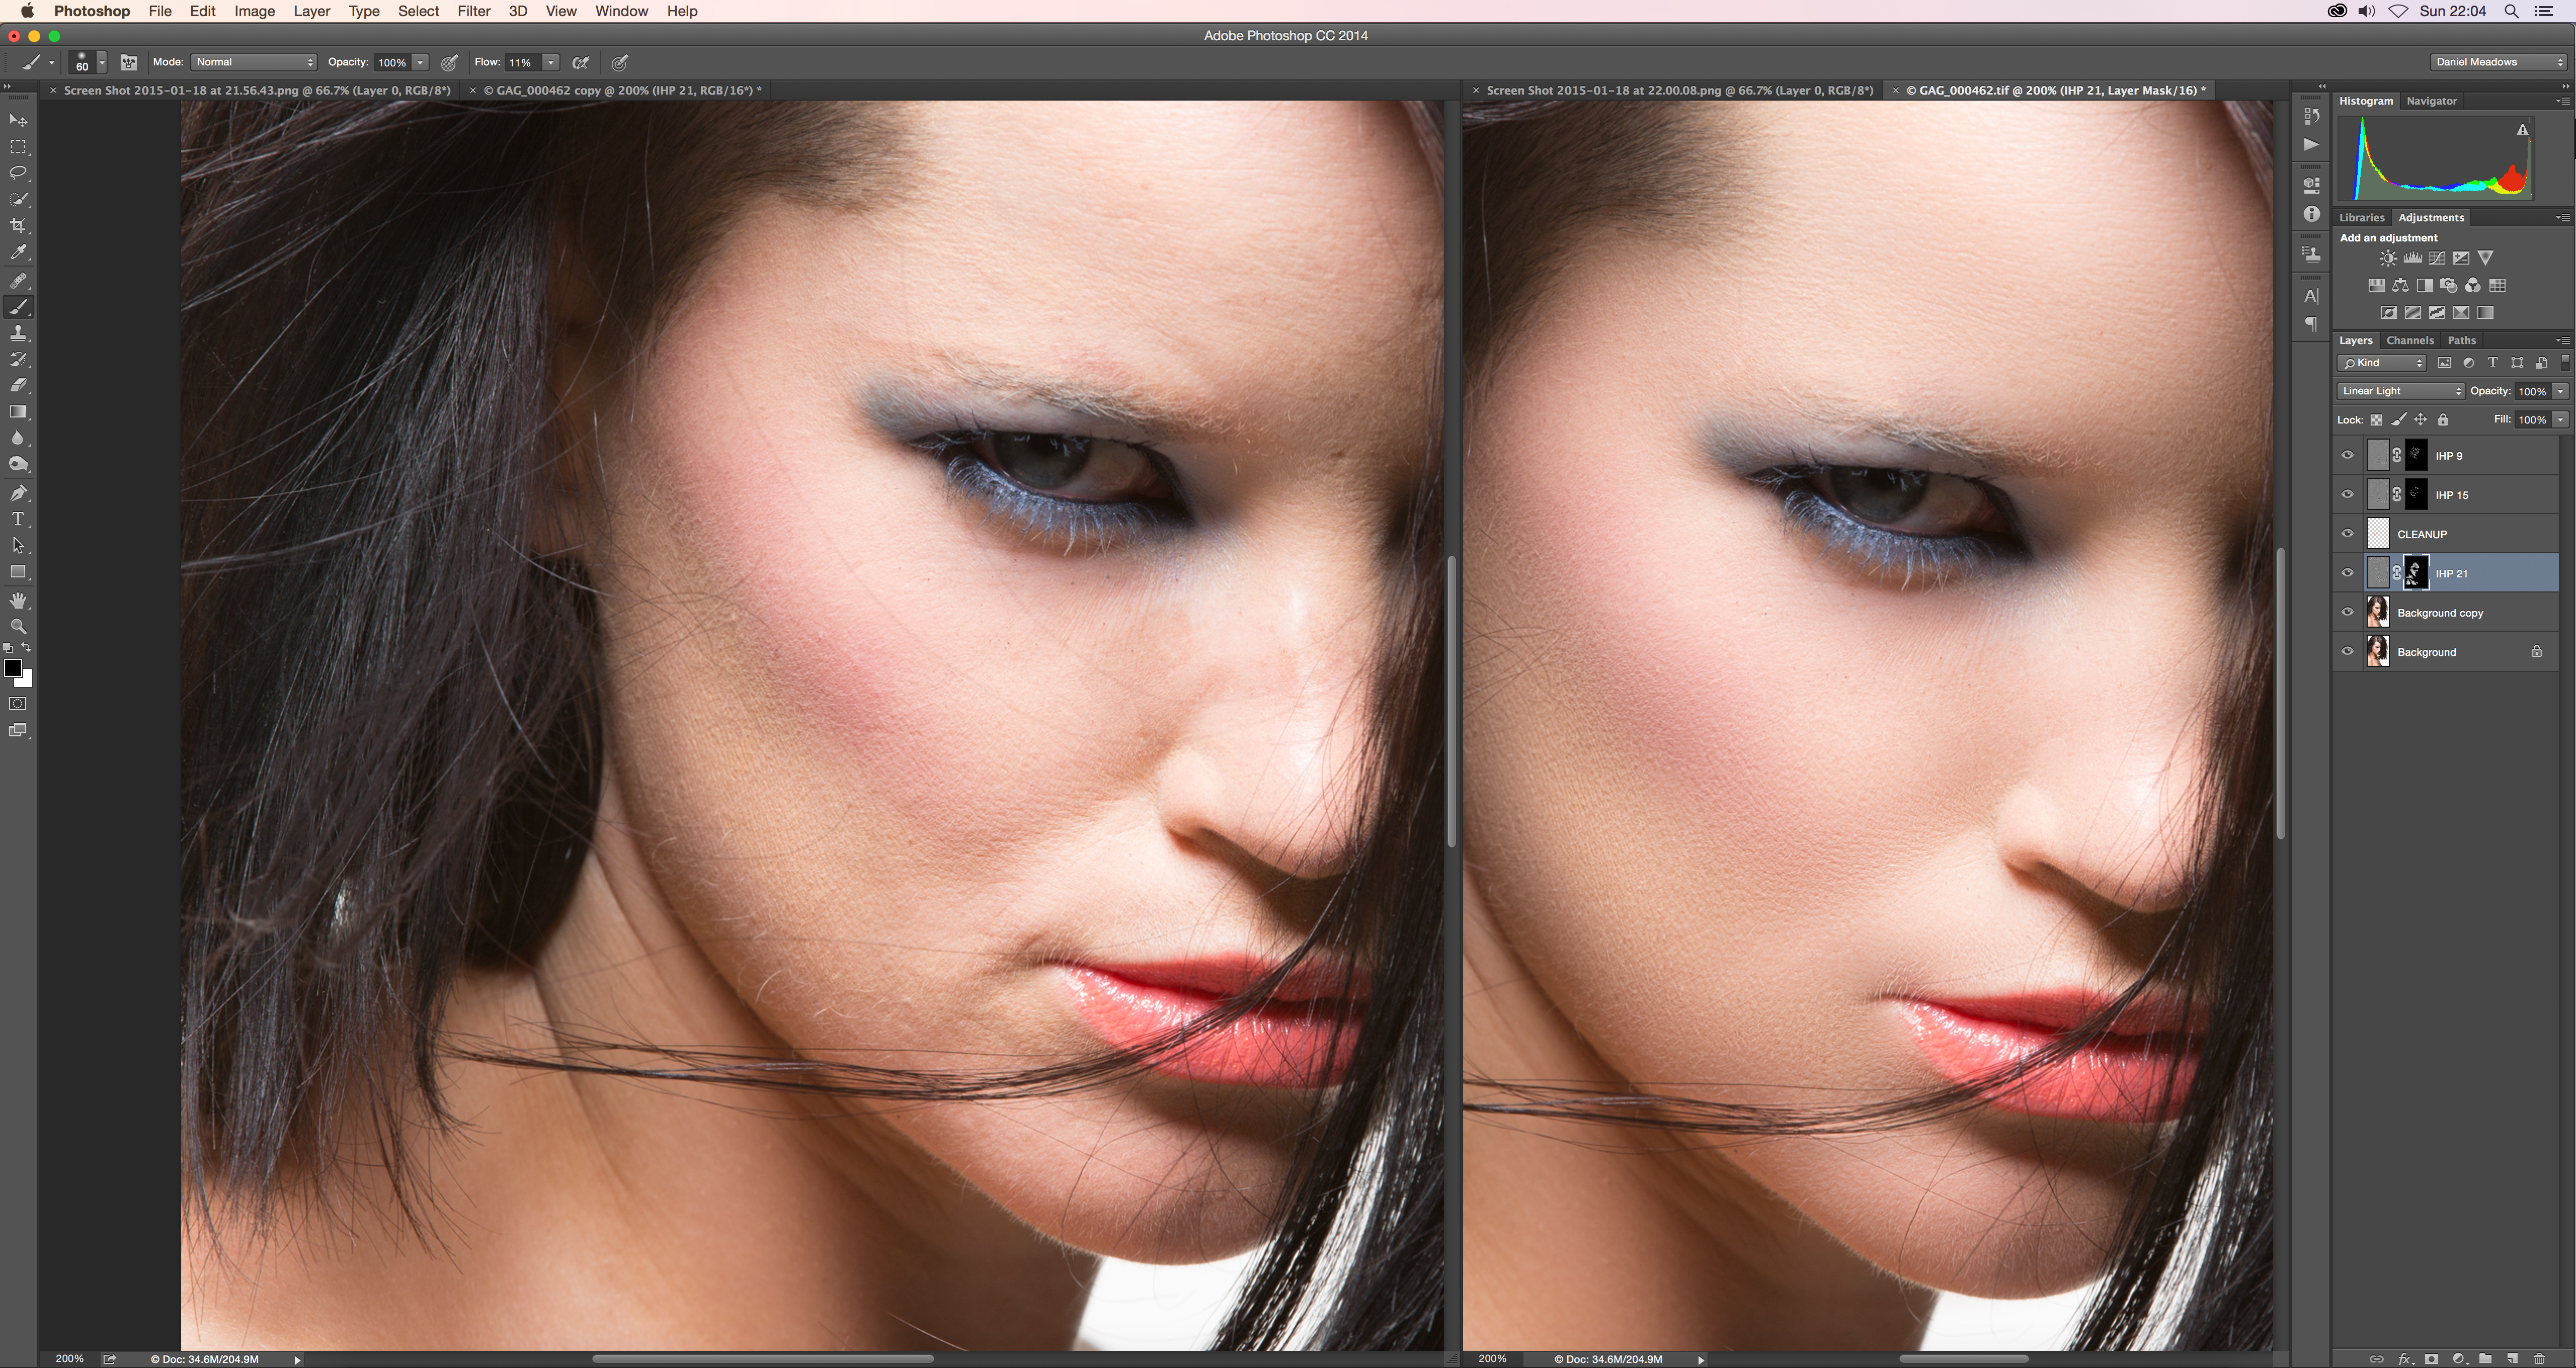
In just a couple of minutes we’ve smoothed out most of the blotchiness. You’ll notice also that it’s great for catching greasy spots, demonstrated here on the middle of the nose. I’d really recommend clicking the shot above to see the full 5k resolution version as it really demonstrates what a powerful tool IHP is.
Moderation and restraint with Inverted High Pass
This footnote is absolutely the most important section of this tutorial. In theory, what we have sounds like a perfect tool, something that is lightning fast at smoothing skin and gives you control over how much texture to retain.
Unfortunately, stand a bit further back from the monitor, further back so you can’t be swayed by the impressive texture retention. It looks every bit as Gaussian blurred as if you’d actually Gaussian blurred it. Considering likely viewing distances in print, and the fact that ink on paper can’t reproduce the sharpness your monitor has no trouble with, the results from IHP as a fix-all technique are unimpressive.
As part of a professional workflow, one that’ll be in demand for advertising and editorial work, inverted high pass should be a supplement to your dodge and burn skills, one you use subtly and sparingly. It might fix a greasy specular highlight, balance out a patch of uneven makeup or even help to make a straight hairstyle appear straighter and glossier, but applying it liberally to skin as in the demonstration leads to poor results.
In Part 2, coming soon, I’ll cover other uses for inverted high pass, including proper application in skin, hair and backgrounds. I’ll also include my own IHP Photoshop Action set. Photo Credit Cristopher Lapp.
~Daniel
Follow @dmeadowsretouch
Daniel, you mentioned on another site you were interested in an Adams Retouching Machine.
I have one for sale that is mint along with a lot of the dyes used for it.
I left you a message a week ago but you didn’t respond.
Thanks,
Hi Michael, apologies for that, I don’t remember seeing it. I guess it’s something I’d like to pick up at some point as a novelty but I’m in no rush. Please do feel free to email me a price though!
i want video tutorial in inverted hi pass………….ple
Hi shridhar, if you subscribe to my YouTube channel I’ll be producing an IHP video along with quite a few others!
Danny
Hi Danny,
Interesting approach, I’d just found your site a few days ago and am still excitedly trying the detailed D&B approaches. This fast 3/1 approach is more akin to the the old approaches i might have tried before. And similar too to the FreqSep approaches i’ve tried.
I’m assuming you offer this here as a fast alternative to the orig D&B approach, i’m also assuming that you’d still recommend the full D&B over this approach when possible?
What i liked about the D&B approach was how the tonal range of the skin seems to balance out, not smudge out as here.
p.s in the opening line under simple steps you mean Can not Can’t is you have no prior steps.
p.p.s. is your FB group your most active forum.
I do look forward to other appraoches you might share.
Many thanks.
Stuart
Hi Stuart, this is absolutely a ‘finishing tool’ to accompany good dodge and burn technique. It’s a little ‘cheat’ in essence, and after a good while you get used to seeing those small areas that’d benefit from the most reserved and subtle application of IHP. I’ve seen shots that use this method exclusively to smooth skin; the results are nightmarish!
Ah, many thanks Danny 🙂 much appreciated.
THANK YOU FOR THIS! I have seen this effect on so many photographs but no retouching tutorial has ever achieved this effect after more than half an hour in post! Again, thank you so much, you can never imagine the relief!
Haha, you’re welcome! Just remember not to overuse it, think of it as a very subtle finishing tool.
Thanks for the article. It is great to see how to use such a powerful technique. I’m keen to see your promised follow up article where you explain where and how to use this technique. When will you write it?